Get started with the docker philosophy and basic docker commands
Objective
Background
Almost all of the cloud computing world uses serverless or containers today. A competent software developer must know how containers work and how to use them in production systems..
There are different aspects of containers that come into picture when it comes to action. Creating containers, creating container images, making scalable container configurations, swarm, kubernetes and other container driven features like serverless or cloud run etc.
So, It's very important to understand the philosophy of containers and get familiarised with container basics if you are going to work as a backend developer. The basics include
-
Why containers, how is it evolved? What advantages it offers on top of other systems.
-
Understand the syntaxes used in Docker file
-
Create and run basic containers from your code or images.
In this Crio Byte,You will go through this flow and get your hands dirty with containers.
Primary goals
Here are a list of things you will learn in this Crio Byte:
-
Get familiar with container terminology.
-
Learn basic container creation using Dockerfile..
-
Publish your code using containers.
Objective
Get started with the docker philosophy and basic docker commands
Background
Almost all of the cloud computing world uses serverless or containers today. A competent software developer must know how containers work and how to use them in production systems..
There are different aspects of containers that come into picture when it comes to action. Creating containers, creating container images, making scalable container configurations, swarm, kubernetes and other container driven features like serverless or cloud run etc.
So, It's very important to understand the philosophy of containers and get familiarised with container basics if you are going to work as a backend developer. The basics include
-
Why containers, how is it evolved? What advantages it offers on top of other systems.
-
Understand the syntaxes used in Docker file
-
Create and run basic containers from your code or images.
In this Crio Byte,You will go through this flow and get your hands dirty with containers.
Primary goals
Here are a list of things you will learn in this Crio Byte:
-
Get familiar with container terminology.
-
Learn basic container creation using Dockerfile..
-
Publish your code using containers.
Open a Linux terminal
Note
If you are taking this Byte on your personal Linux machine, open a new terminal and proceed to the next milestone. You may skip the rest of this milestone.
Instructions for the Crio Workspace
To open a terminal in the Crio Workspace, follow the steps below:
-
Click on the workspace icon on the left sidebar and click on the
Startbutton to create your workspace (Note: it can take up to 15 minutes to create your workspace). -
Once your workspace is ready, click on
Launch online IDE. -
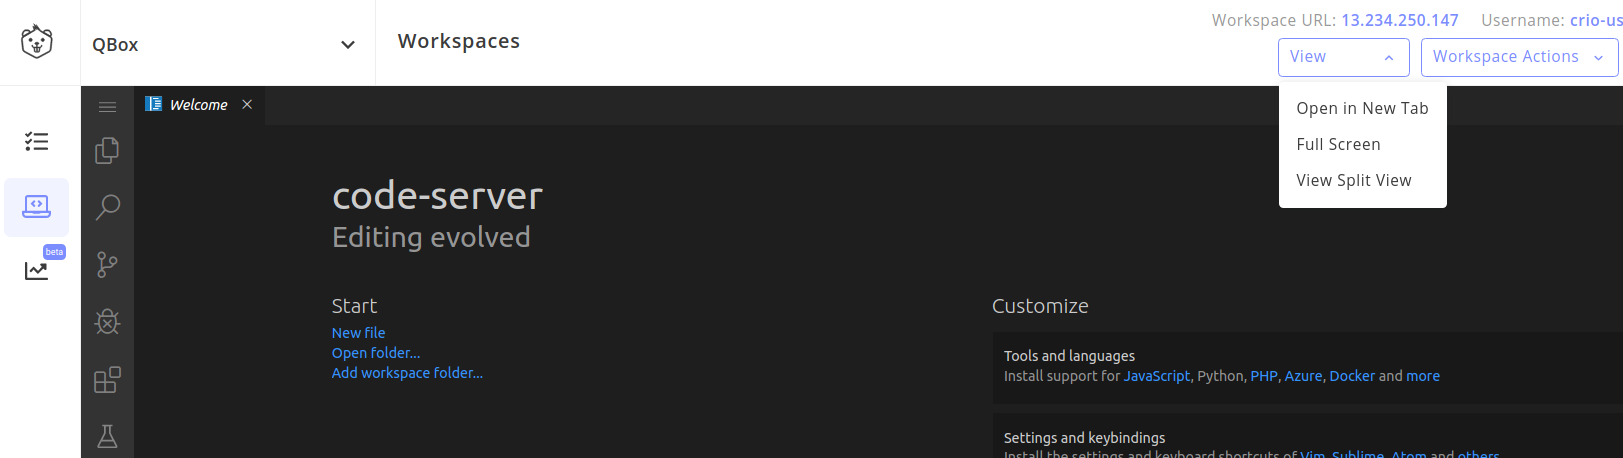
Click on
View > Open in New Taboption (see image below).
- Open a new terminal, click on the
Menu > View > Terminal. (Note: The menu button is on the top-left (three horizontal bars).

Why Containers?
Pradeep was a developer at QMoney which was a portfolio management firm. They had a clear product which was showcasing users their profit and loss based on the portfolio,
Now, QMoney decided to allow users to make trades with stock exchanges. The stock exchange provided a library that could best run on Python, while QMoney used java as a primary language of development.
This resulted in QMoney hosting another microservice built in python to provide the functionality to put the trades. This library worked best on python 3.4, and was a a great addition to QMoney stack,
However, Developers in QMoney now had to run two different servers in order to run the application. It was fine so far. However, last month, the QMoney research team came up with another product that did the technical analysis on the portfolio, stocks and their historical performance, to suggest the new stocks to buy. This library was running on bleeding edge versions of Tensorflow, and required minimum versions were Ubuntu 20+ and python 3.8+
This triggered a lot of issues for Qmoney developers executing end to end workflows. Now they had three servers running on the machines
-
Ubuntu 18 + Java 11 + QMoney Rest APIs
-
Ubuntu 18 + Python 3.4 + trading apis
-
Ubuntu 20 + python 3.8 + tensorflow
So you have any suggestions on how to make it work? Note down your thoughts on notepad, and watch this video.
https://www.youtube.com/watch?v=wi-MGFhrad0
Evolution?
This problem becomes even challenging when you have multiple releases that work across different stacks. Think about different combinations of different versions of Java and python which you want to run on the same machine. That makes it extremely difficult to manage the ecosystems.
In older days, we used to set up separate machines in the development environment in order to replicate multiple versions of a product. Very soon it became so difficult to manage, but then we came up with Virtual machines.
Have you ever heard of VirtualBox or VMWare? Running Linux inside Windows? The underlying technique was called Virtualization.
-
Have you ever tried running Ubuntu on a Windows machine using a virtual box?
-
What challenges did you face while running using the virtual box?
-
Have you heard about Windows SubSystem Linux (WSL)?
Let's take a quick look at the evolution of containerization https://www.youtube.com/watch?v=JSLpG_spOBM
A recap to be added here
Feel the pain of going without docker
Now that you have done some part of theory. Lets try to get a feel of how docker helps us
Lets try to install RabbitMQ on your workspace. Here is the quide to install the same.
https://computingforgeeks.com/how-to-install-latest-rabbitmq-server-on-ubuntu-linux/
What are the steps involved?
-
Install Erlang
-
Install RabbitMQ
-
Setup ports etc
Of course it's not as simple as you see in the three steps above. There will be challenges on every of these steps that you will face, right from sudo privileges to user settings etc..
What if you wanted to configure it on a remote server?
In a nutshell, when you install a software on your system, following are the tasks done
-
Install executables
-
Setup default configurations
-
Create user groups that have specialized access
-
Setup startup/ shutdown scripts
-
Configure system services.
Moreover, Once installed, some of these configurations are irreversible. which means there is a fair chance that even if you uninstall rabbitmq from your system, some residual components will remain..
Which means, every software installed on your system pollutes your system in a way!
Containers solve this problem. Assume you want to run the rabbit mq on your system, it can be done in single command
docker run -d --hostname my-rabbit --name some-rabbit rabbitmq:3
Try running this command in your terminal. It will download and run a rabbitmq server in no time. While you still have to make database and other configurations, the most challenging part of prerequisites and everything else is solved.
What about QEats?
Let's take it further to our QEats application,
What if you want to run QEats on the production server? This the the prerequisite
-
Java
-
Mongo
-
RabbitMQ
-
Redis etc.
It would take a lot of time to install everything and run. But what if you don't want to go through that pain?
And how about running it in single command?
docker run -p8081:8081 criodo/qeats-server
Now, open another terminal and try accessing the QEats api on port 8081?
curl -X GET "http://localhost:8081/qeats/v1/restaurants?latitude=28.4900591&longitude=77.536386&searchFor=tamil"
Did it work? How? Did you install anything? Then how did it work?
Create your first container
Like all other scripts, docker also has its own scripting language, which is very similar to shell scripting.
Let's try ourselves.
Goi to your workspace and create a directory called docker-apache
cd ~/workspace

mkdir docker-apache && cd docker-apache

touch Dockerfile

echo -e "FROM httpd:2.4\n \

RUN echo "Hello World" > /index.html \n \

RUN cp /index.html /usr/local/apache2/htdocs/" > Dockerfile
Or open this Dockerfile in editor and paste below content into the same
FROM httpd:2.4

RUN echo "Hello World" > /index.html

RUN cp /index.html /usr/local/apache2/htdocs/
Now, go to the directory and Issue below commands -
-
cd ~/workspace/docker-apache
-
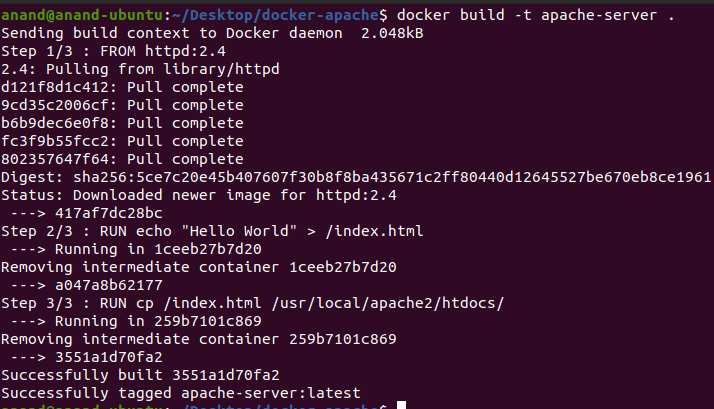
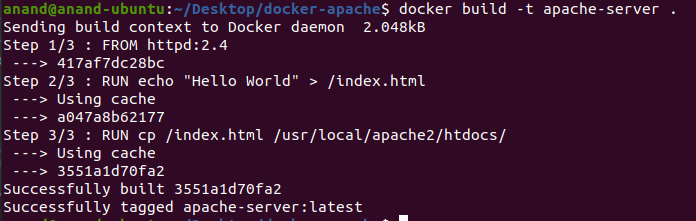
docker build -t apache-server .
-
Check the output
-
Now, let's try to run the container
docker run -p80:80 apache-server
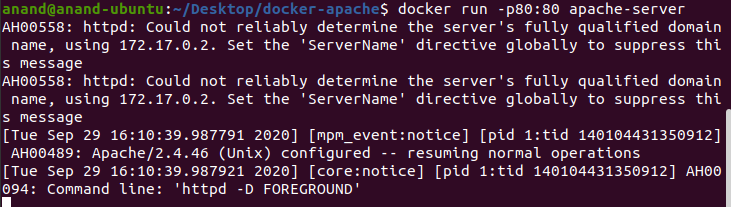
Hit the page from browser or curl
curl [http://localhost](http://localhost)

What are these steps for getting logged in the output?
Now run another command
docker images -a
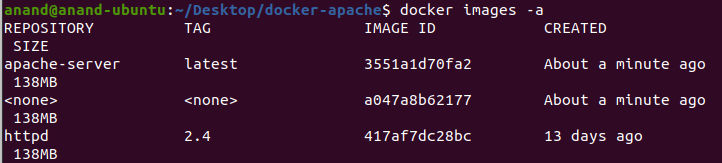
While we built only one image using the container, the images actually have three images. What are these two images about?
Now, try to build the same image again
docker build -t apache-server .
This time, the command finished in milliseconds, which obviously happened because of some sort of cache. What kind of cache iis it?
It's usually called layers in docker world.
Introduction video to docker layers
Getting started with Layers
Now, let’s try to go with a little complex example. Lets say, we want to build a container from a spring boot application
Here is the docker file, We will first try to understand the docker file, and then look at what happens when we run it.
cd ~/workspace

git clone [git@gitlab.crio.do](mailto:git@gitlab.crio.do):public_content/spring-starter.git

cd spring-starter
This spring starter has a file named Dockerfile which contains a code like below. Try to browse through it, and see what it does.
FROM gradle:jdk11


ENV DEBIAN_FRONTEND=noninteractive

RUN apt-get update && apt-get -y upgrade

RUN apt-get -y install git redis-server wget


RUN apt-get install -y gnupg

RUN wget -qO - https://www.mongodb.org/static/pgp/server-4.2.asc | apt-key add -

RUN wget -qO - https://www.mongodb.org/static/pgp/server-4.2.asc | apt-key add -

RUN echo "deb https://repo.mongodb.org/apt/ubuntu xenial/mongodb-org/4.2 multiverse" | tee /etc/apt/sources.list.d/mongodb-org-4.2.list

RUN apt-get update

RUN apt-get install -y mongodb-org


USER root


RUN mkdir code

COPY . /code


RUN cd /code && ./gradlew bootjar


CMD /code/start.sh
Let's take a look at the steps involved in building this image.
-
Baseline for this image is gradle:jdk11 image available on docker hub. The details are available here
-
Next is ARG command, that sets up a temporary environment variable which enabled non-interactive install
-
From step 3-9 are few commands that install required softwares on the machine.
-
Step 10 is changing the underlying user to ROOT
-
Step 11 is a COPY command that can copy files from Host filesystem to guest filesystem
-
Step 12 and 13 are about making another directory
/codeand copying the contents of current directory on host os to/codeon the guest os. -
Step 14 is again another command that actually builds the copied spring application and generates a bootable jar that can be used as a server.
-
The last line is about defining entrypoint. While you can say that everything from Step 1-14 attributes to the container image, Step 15 is executed when you start the container for the first time. When you start the container, the command mentioned as
CMDwill be executed.
Let's try to create the image now.
docker build -t spring-starter .
Now go to hub.docker.com, We have the same image pushed over there. https://hub.docker.com/repository/docker/criodo/spring-starter/
Click on tags.
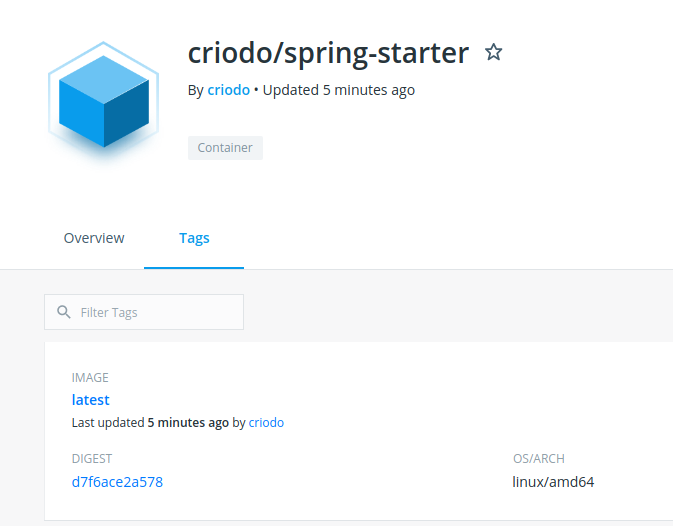
Click on latest and it will show the details of the docker image.
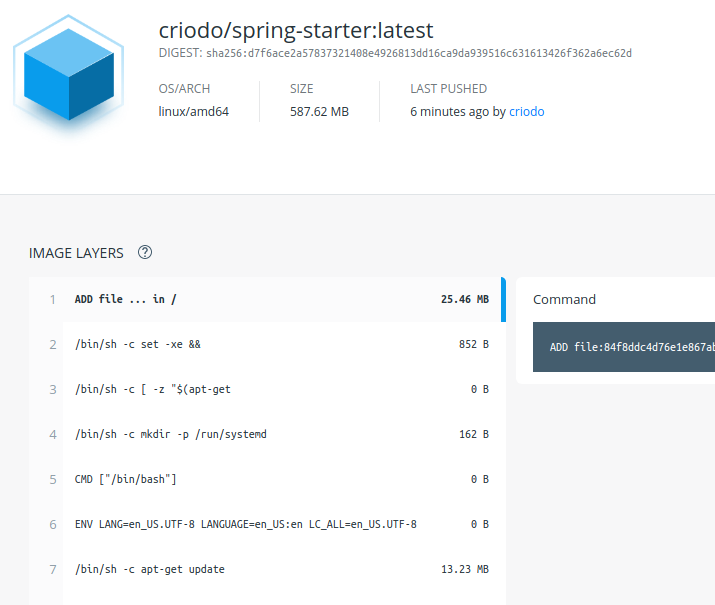
Click on the commands shown there to see the details of each command
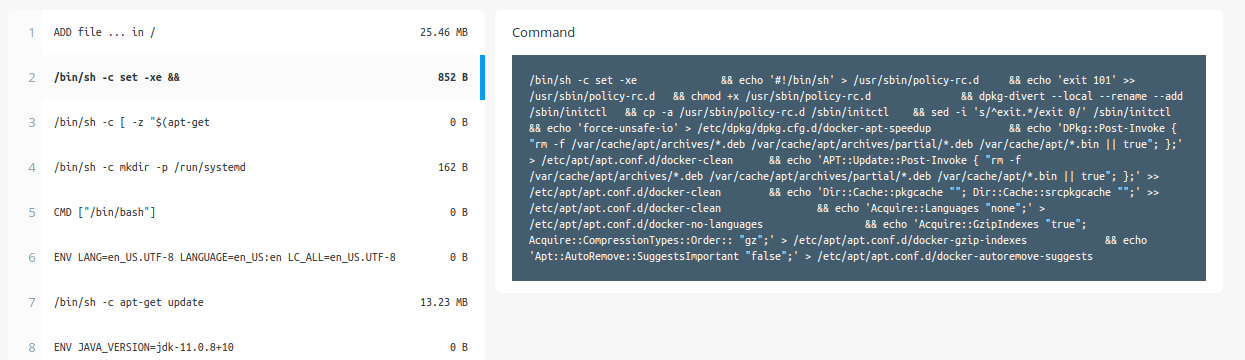
Layers is nothing but something similar to git commit. When you execute any command during docker image creation, the changes are recorded as a layer, and not persisted on the image.
When a container starts, these changes are "Computed" based on layer information, and the filesystem is derived.
By now, you know that containers share the file resources with host operating system, including kernel and process space.
References
Curious Cats
Can you push your own images to docker repository?
Now, create an account on https://hub.docker.com
And login from terminal
docker login
Once you login, push your image using the command below
docker images

docker tag <image_id> <your_docker_hub_id>/spring-starter

docker push <your_account>/spring-starter
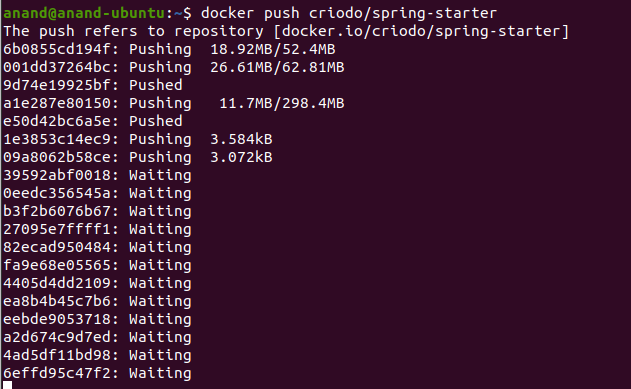
Once this command is done with execution, you will see it uploaded on your account on docker
Get introduced to common docker commands
Working with containers is not just limited to starting and stopping the containers. It has much more features than just an OS.
What if you want to share the filesystem with the container? Does containers support that?
What are the parameters supported by docker command? Let's check it out.
run > docker --help
It lists down multiple options. Out of which few important options are the one’s we will discuss further.
We can group these commands in three categories -
Container management
-
docker build - we have already discussed this option while building the images, so we will not go through it again.
-
docker ps / docker ps -a - This command lists all running / stopped containers in the workspace
-
docker rm - this command is used to remove a container from workspace. This is as good as VM termination.
-
docker rmi - this command is used to remove the underlying image from cache.
-
Docker images -- ?
Container execution
-
docker run - This command is used to run a container. It comes along with multiple options, which we will discuss in further sections. Just to summarise, the common options used are
-
volume
-
port
-
name
-
attach
-
rm
-
The whole list can be found with
[docker run --help](https://docs.docker.com/engine/reference/commandline/run/)
-
-
docker stop - This will stop the running container.
-
docker start - This command will start the stopped container.
Container Communication
-
docker exec - This command will connect to running container and execute a given command on the container.
-
docker cp - This command is used to copy the files to/from the running container.
We will see these commands in advance docker byte..