To build an Android application for managing contacts using Android Studio, Java and SQLite3.
Objective
Project Context
Java is one of the most popular programming languages in the world. Java classes run on Android Runtime (ART), a specialized virtual machine.
The Android Studio IDE is the best way you can build an android application with utmost ease. It is based on IntelliJ IDEA and also the official environment for Google's operating system. Features like real-time profilers, intelligent code editor and fast emulator makes the work in Android Studio fun. Android SDK is the official development kit for Android App development.
The main aim is to build a Contact Application which can be used by a user to make calls, store contact numbers in their respective local storage and also provide a simple way to delete them too. This will be kind of a basic phone book application. This project will also include brief usage of SQLite3 database for local storage of data.
Project Stages
This project consists of the following stages: 
High-Level Approach
- Creating the loading screen with Splash time.
- Creating the registration and login activities.
- Connecting the database and storing the registration details in the database.
- In Login Activity, checking if the inserted data matches with database or not.
- Creating custom recycler view to show the data present in the database.
- Adding a Call function (for which the call access permission should be given.
Sample Application Design
-
Loading Page
-
Login Page

-
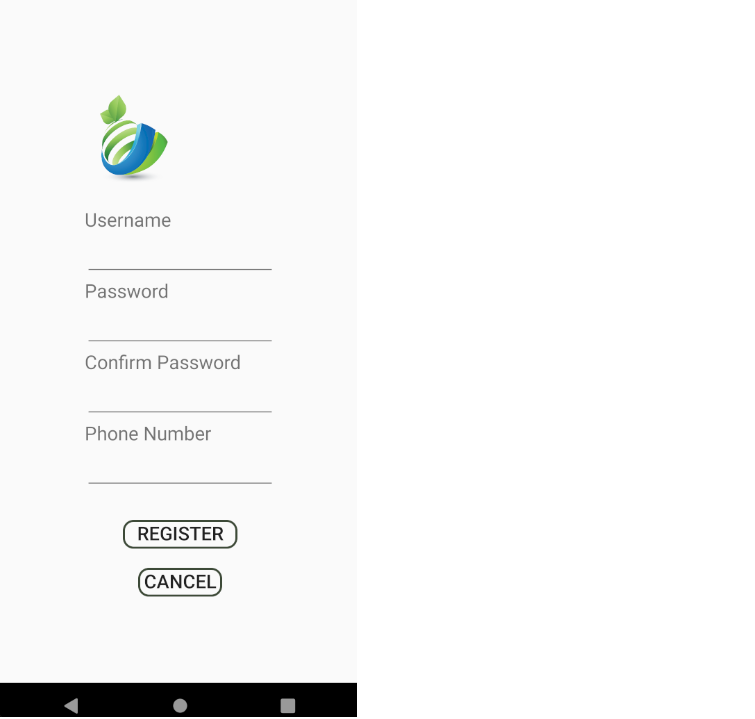
Registration Page
-
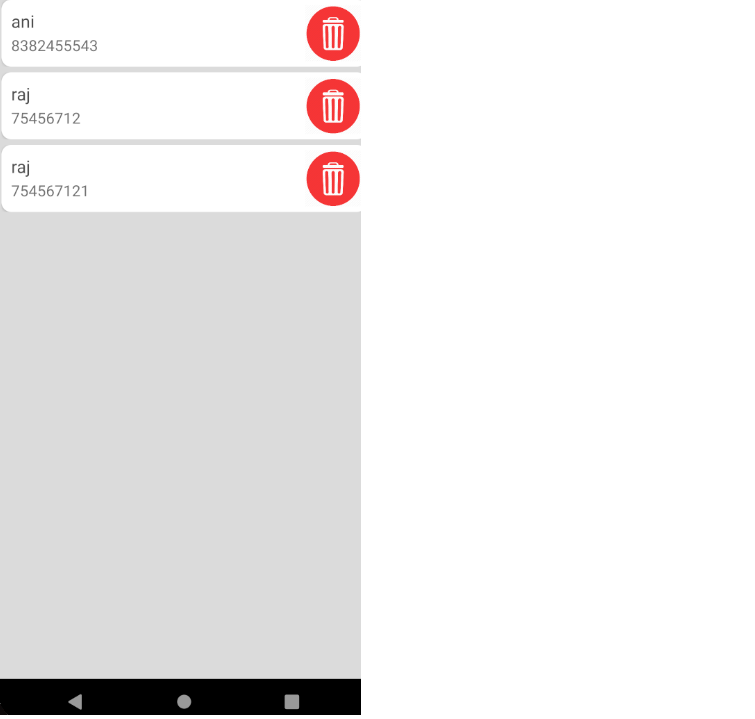
Recycler View List
-
Contact Details and Calling

Objective
To build an Android application for managing contacts using Android Studio, Java and SQLite3.
Project Context
Java is one of the most popular programming languages in the world. Java classes run on Android Runtime (ART), a specialized virtual machine.
The Android Studio IDE is the best way you can build an android application with utmost ease. It is based on IntelliJ IDEA and also the official environment for Google's operating system. Features like real-time profilers, intelligent code editor and fast emulator makes the work in Android Studio fun. Android SDK is the official development kit for Android App development.
The main aim is to build a Contact Application which can be used by a user to make calls, store contact numbers in their respective local storage and also provide a simple way to delete them too. This will be kind of a basic phone book application. This project will also include brief usage of SQLite3 database for local storage of data.
Project Stages
This project consists of the following stages:
High-Level Approach
- Creating the loading screen with Splash time.
- Creating the registration and login activities.
- Connecting the database and storing the registration details in the database.
- In Login Activity, checking if the inserted data matches with database or not.
- Creating custom recycler view to show the data present in the database.
- Adding a Call function (for which the call access permission should be given.
Sample Application Design
-
Loading Page
-
Login Page
-
Registration Page
-
Recycler View List
-
Contact Details and Calling
Getting the concepts ready
This task is all about the concepts that will be needed in building our application. Checkout the Requirements given below for more details.
Requirements
- Understanding how activities are rendered in the application. Also, what do we mean by activities in Android?
- Understanding the concept of Activity Life Cycle.
- Learning about Intents in Android, which will be your best friend in Android application development. It will help you communicate within you activities.
Bring it On!
- Try creating the basic layout of your application, may be try to draw out the design of your app. Develop a basic design layout, or you can go as creative as you want. [Note: You can use the sample designs as well.]
- XML is always there to make your designs easier and easy to visualize too. Use it!
Expected Outcome
The main purpose of this task is for you to have a basic knowledge of the life cycle methods of an Android application and how to communicate and transfer data between your activities.
Setting up the main project
It's time to work on the actual project. We'll start off by creating the basic structure of the project. [NOTE: The file structure is of a typical Android project. You are free to refer to official documentations for the file structure.]
Requirements
- Add all necessary dependencies for your project in the
build.gradlefile. Gradle is a build system commonly used in all java applications to automate building, testing and deployment.build.gradlecontains scripts to automate several tasks like simply copying some file from one directory to other. It containscompiledSdkVersion,buildTypesanddependencies. The following Dependencies need to be added:appcompat- maven dependency for using various frameworksrecyclerview- dependency for using the recycler view in our appcardview- for using cardview class with the viewholder classconstraint-layout- for designing in constraint layout
dependencies {
    implementation 'com.android.support:appcompat-v7:28.0.0'
    implementation 'com.android.support:recyclerview-v7:28.0.0'
    implementation 'com.android.support:cardview-v7:28.0.0'
    implementation 'com.android.support.constraint:constraint-layout:2.0.4'
    implementation 'com.android.support:design:28.0.0-rc01'
    implementation 'de.hdodenhof:circleimageview:3.0.0'
}
- Now after setting the proper dependencies, we can see main activity being present by default in our application. This main activity class will be the first function to be executed when our application will be launched. We can create new activities for different pages of your app under
com.example.[appname]by creating new classes under this directory.

- Each activity can be designed using xml and the component
.xmlfiles can be found in thelayoutfolder of theresdirectory. In theactivity.xmlfile we can design our activity screen using XML and drag & drop methods. - Always remember to map the elements in the
.xmlfile to yourclass activityfiles. - The
drawablefolder underres(resource) directory will contain all your images, designs etc. files needed for the frontend. - Now go on creating as many activities you will be using in your app. Always make sure that the main activity will regulate the flow of the application i.e., which activity will be followed next.
Intentswill be come handy here.
Expected Outcome
You should be able to create a basic layout of your app with few activities. [NOTE: For this task we are just expecting empty files for the classes. The content of these files are discussed in the next sections.]
Registering Users & Authenticating Login
The basic idea of our application is that multiple users can register on the application and store details of various contacts and access the same on login. In this milestone, we'll be accepting user data on registration which needs to be fed to the database and then while login the user will be authenticated when the user enters a valid input in the placeholders and clicks on the Login button.
Requirements
- Creating placeholders for the name, username, mobile number, password for the user input in the
Registrationactivity. TheLoginactivity will require only username and password. Intents can be used here to take the values of these placeholders and transfer it across our list of activity classes. - Create a
UserDataclass which will contain the way in which data will be stored in our database. Idea is to have objects of users in which each object shall contain username and mobile number. - Once we are done with this, we have to connect our database to our application where user data will be stored. Create a
DatabaseHelperclass which will be used to connect SQLite3. SQLiteOpenHelper is used to create an object to create tables, open or manage the database. Here also define theschemaof the database by executing acreate tablequery in theonCreate()method inDatabaseHelperclass.- Now we need the
Registrationactivity class to call ourDatabaseHelperclass using an object ofSQLiteHelperto send the data inserted in theplaceholderstoDatabaseHelperclass where these will be fed to the database. This method shall contain the username, mobile number, password as the arguments. - Create an
insertmethod inDatabaseHelperclass which will receive the arguments fromRegistrationactivity and feed it to the database usingContentValues. You can have the return type of thisinsertmethod as Boolean to check whether the data has been successfully inserted or not. ContentValues is a map like class that matches string key and inserts the data given into it as arguments into the table
- Now we need the
- Now in the
Loginactivity class we have fields forusernameandpassword. We need to check that if this user is present in our database or not and then if there is a user present we need to authenticate that the user has entered correct password or not.- Create a
check_usernamemethod inDatabaseHelperclass which receives theusernameas argument to check if it is present in the database or not. - Create a
matchmethod in ourDatabaseHelperclass which receivesusernameandpasswordas arguments and checks if thepasswordmatches with thepasswordpresent in the database. - Here in the
matchmethod we have to usecursorfor iterating through the table stored in the database. Cursor basically contains the result of a query made against a database in android. Use thegetCount()method of Cursor which returns the number of matches, if it returns zero hence no matches found and user is not present in the database.
- Create a
- Also check out these commands for creating and updating the tables of your database.
- Executing create table - onCreate() This will contain the database query executing command for creating a table.
- Updating table - onUpgrade() This will contain the command for updating data in our database.
Bring it On!
- How to verify whether the classes coded in this milestone will work as expected or not? For testing them, we can write unit test cases using JUnit. Try to do so.
Expected Outcome
You should be able to write the necessary content for the Registration and Login activities. The data coming in from the Registration activity should be passed to the DatabaseHelper which feeds it to the database. The Login activity shall call an authentication method of DatabaseHelper class to authenticate the user.
Building the recycler view adapter and populating the list
In this task the aim is to build a custom recycler view for our list in which the data present in the database will be shown.
Requirements
- We have to create a custom recycler view class. RecyclerView is a class under
ViewGroupwhich helps in building and displaying large sets of data efficiently. In our case, we will use it to build a list of items which shall display the username, phone number and a delete button for each element in the list.ViewHolderclass provides all the functionality for each list items. To implement a customRecyclerViewwe would need a Custom Adapter also.Adapterassociates the data with the ViewHolder class. - Before moving ahead we need to create a method
getAllContacts()in theDatabaseHelperclass which returns all the data present in the database by iterating through it usingCursor. This is first needed to get the data in anArrayList. Then we move onto creating our recycler view. - Now create a
ContactsViewclass which is basically theRecyclerViewwrapper class. This class calls on theRecyclerViewAdapterclass with arguments as theArrayListofUserData. This also defines the layout of the list i.e. whether you want a vertical list or a horizontal list. It contains two methods -onCreate()- calls theRecyclerViewAdapterclass and sends theArrayListofUserDataas argument. It also manages the layout of the list view. This method will call the next methodloadContactList().loadContactList()- This method should have an instance of the database which is used to call using theDatabaseHelperobject to get the list of data stored in the database. It also calls thegetAllContacts()to populate the adapter list in the next step.
- Create a custom
RecyclerViewAdapterclass which will denote each row of the database. In this class we should have anArrayListofUserDatato receive the same fromContactsView. Each of theviewsin the list will contain username, phone number and a delete button. Each of the list view item is represented byRecyclerViewAdapter. - This class has various methods like
onCreateViewHolder()- used to populate the list receiving data fromUserData.getItemCount()- returns the number of rows in the list.ViewHolder()- contains a database instance and deleting method. The delete button is used with aonClickListenerevent to delete the current list item when this button is clicked.- Create a
deleteContact()method in theDatabaseHelperclass that receives aUserDatato be deleted and deletes that data from the database.
References
Bring it On!
- As discussed above we can change the layout of the recycler view which is vertical by default. You can try to make a horizontal scrollable list. Try to do so.
Expected Outcome
By the end of this milestone, you should have a working RecyclerView list populated with the data in the database with each item having username, mobile number & delete button.
Adding the Call & Image capture method
By now we have almost come to the end of our project. The only part left is to create a details page from which we can make a call and also store image in the contact details. We will also be using a circular card view for some customization to our details page. Displaying an image is done using ImageView but it is difficult to create circular view with it. Hence we will use card view library to make our task simple. The activity_contact__details file corresponding to the ContactDetails class can also be used to modify the changes.
Requirements
- Create a
ContactDetailsactivity class along with call button, mobile number and profile photo. - Add the permission for using the camera and calling option in the details activity. The camera and call permissions have to be allowed manually from the settings of the android device.
- Create two different
onClickListenermethods, one for camera access and clicking the image, while the other is for making a calling method which is implemented by usingIntentmethods for performing the call function.public static final int CAMERA_REQUEST=9999; // mention these in the onclick listener functions Intent callintent = new Intent(Intent.ACTION_CALL); // for call Intent intent = new Intent(MediaStore.ACTION_IMAGE_CAPTURE); // for camera - Now you also have to store this in the profile image, for which we have to convert our image into
bitmapand then store. Before inserting into database, you need to convert your Bitmap image into byte array first then apply it using database query. - This
bitmapimage has to be stored in the database using an instance of it. It should call a methodInsertImage()inDatabaseHelperclass which takes in thebitmapimage and converts it into abyte array. TheInsertImage()method inserts the image into the database using the two argumentsbyte arrayandusername. Query commands are executed here. It uses theCursoragain to search for the correspondingusernameand then with the help ofContentValuesinserts into the database.
Bring it On!
- You can try showing the Image in each item of the recycler view list in the
ContactViewactivity. [NOTE: TheAdapterhas to be modified to store animage view.] - By now the application should be ready. Build an APK and take the app for a test run.
- Customize the application in your own flavour, suitable enough to be published on the Google Play Store.
Expected Outcome
You should be able to develop the details page along with the basic functionalities of calling function and image capture function.