Building a social media application using Kotlin, inspired by Instagram.
Objective
Project Context
Social Media gives the common man a platform to voice with complete freedom of expression, be it for supporting a cause or for addressing a national or international issue of any sensitivity. Business prospects and job opportunities gear up as social media is a stage with global audience to showcase our talents.
Social media started off as a trend among youth but today it has emerged as a medium that influences even Presidential elections.
Instagram is a social media app that has grown immensely over the years, and it continues to broaden its horizons. The photo-sharing app has gone a long way from once being a favorite for vacationers sharing their holiday pictures to now appealing to all kinds of influencers, advertisers, and brands.
The early version of Instagram was a html prototype for photo-sharing. But as time progressed, a bundle of languages were used to create this awesome clutter free app.
Through this project, we’ll discover a way to build a basic functional clone of Instagram, relying on Kotlin and Firebase.
Project Stages
The project consists of the following stages:

High-Level Approach
- The first task will be to download Android Studio and set it up.
- Once we have the environment ready, we can start off by creating the bottom Navigation Bar of the app.
- Next task is creating the layout of all the fragments. In this project, we’ll keep the things simple by including only basic features.
- We will use Firebase for handling our database and authentication. Firebase database will be used to store the login information for the users and other resources like Posts, Likes, etc.
- Once we have Firebase setup, we can work on the Sign Up and Login of our application.
- Next step is to add the feature of Edit Profile for users.
- In this project, we’ll divide the main task into three functionalities: Post Functionality (to manage post details and display them), Like, Comment and Save Functionality (for managing the reactions received by any post) and Notification Functionality (to notify the user about the reactions).
- Successful implementation of the above steps will lead to completion of creating our own Instagram like social media app.
The video below shows a demo of the application.
Primary goals
- Create bottom navigation bar to navigate between pages.
- Create home page to display posts.
- Create profile page to display user information.
- Create a login and signup page for users.
- Create an Edit Profile page for editing user account information.
- Add functionalities like post, like, save, comment and notification functionalities.
Credits
"Coding Cafe YouTube Channel"
Objective
Building a social media application using Kotlin, inspired by Instagram.
Project Context
Social Media gives the common man a platform to voice with complete freedom of expression, be it for supporting a cause or for addressing a national or international issue of any sensitivity. Business prospects and job opportunities gear up as social media is a stage with global audience to showcase our talents.
Social media started off as a trend among youth but today it has emerged as a medium that influences even Presidential elections.
Instagram is a social media app that has grown immensely over the years, and it continues to broaden its horizons. The photo-sharing app has gone a long way from once being a favorite for vacationers sharing their holiday pictures to now appealing to all kinds of influencers, advertisers, and brands.
The early version of Instagram was a html prototype for photo-sharing. But as time progressed, a bundle of languages were used to create this awesome clutter free app.
Through this project, we’ll discover a way to build a basic functional clone of Instagram, relying on Kotlin and Firebase.
Project Stages
The project consists of the following stages:
High-Level Approach
- The first task will be to download Android Studio and set it up.
- Once we have the environment ready, we can start off by creating the bottom Navigation Bar of the app.
- Next task is creating the layout of all the fragments. In this project, we’ll keep the things simple by including only basic features.
- We will use Firebase for handling our database and authentication. Firebase database will be used to store the login information for the users and other resources like Posts, Likes, etc.
- Once we have Firebase setup, we can work on the Sign Up and Login of our application.
- Next step is to add the feature of Edit Profile for users.
- In this project, we’ll divide the main task into three functionalities: Post Functionality (to manage post details and display them), Like, Comment and Save Functionality (for managing the reactions received by any post) and Notification Functionality (to notify the user about the reactions).
- Successful implementation of the above steps will lead to completion of creating our own Instagram like social media app.
The video below shows a demo of the application.
Primary goals
- Create bottom navigation bar to navigate between pages.
- Create home page to display posts.
- Create profile page to display user information.
- Create a login and signup page for users.
- Create an Edit Profile page for editing user account information.
- Add functionalities like post, like, save, comment and notification functionalities.
Credits
"Coding Cafe YouTube Channel"
Environment setup
Before the start of any development procedure, we need to set up the environment according to our application needs.
Requirements
-
Install Android Studio on your machine.
-
Set up Android Emulator or use developer mode of android phone for debugging.
-
Open Android Studio and install the default project for verifying installation.
-
The Android project contains different type of app modules, source code files and resource files. Here is a short description of these files and resources:
-
Manifests folder - Contains information such as Android version, metadata, states package for Kotlin file and other application component.
-
Java folder - Java folder contains all the Java and Kotlin source code files which we create during the app development.
-
res (resources) folder - Resource folder is the most important folder because it contains all the non-code sources like images, XML layouts, UI strings for our Android application.
-
Gradle Scripts - Gradle is an automated build system and it contains a number of files which are used to define a build configuration which can be applied to all modules in our application.
-
References
Tip
- Logcat is very helpful in finding errors.
Expected Outcome
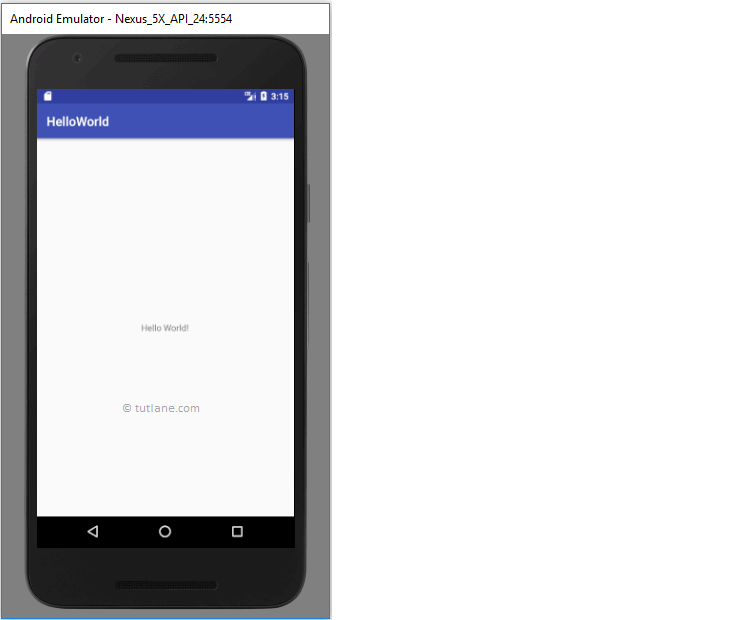
The main objective of this milestone is to make sure that you have the required development environment in place.
On completion of the above requirements,run the application using Run and the end result should be as shown in the screenshot below.
Bottom Navigation View with Fragments
Requirements
-
Start new project and choose
Bottom Navigation Activityas project layout. -
Remove the files and folder shown in picture below
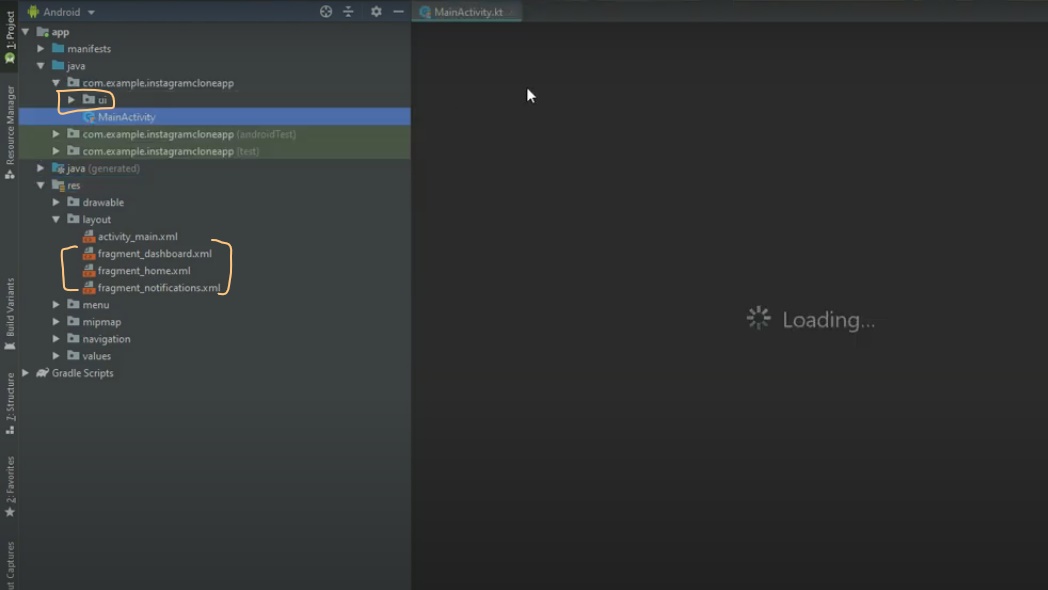
-
Navigate to the
activity_main.xmltab if it is not already open. Change the defaultConstraint LayouttoRelative Layout. It should look like this:<RelativeLayout xmlns:android="http://schemas.android.com/apk/res/android" xmlns:app="http://schemas.android.com/apk/res-auto"> <!---all the xml code for our UI will lie here --> </RelativeLayout> -
Add a
Frame Layoutfor holding fragments. -
To create the Bottom Navigation Bar, include the following code.
<com.google.android.material.bottomnavigation.BottomNavigationView android:id="@+id/nav_view" android:layout_width="match_parent" android:layout_height="wrap_content" app:menu="@menu/bottom_nav_menu" android:background="@android:color/white" app:labelVisibilityMode="unlabeled" android:layout_alignParentBottom="true"/> -
Then, navigate to the
menufolder inresand edit thebottom_nav_menu.xmlas per our requirement. Add the following sections:- Home
- Search
- Add Post
- Notification
- Profile
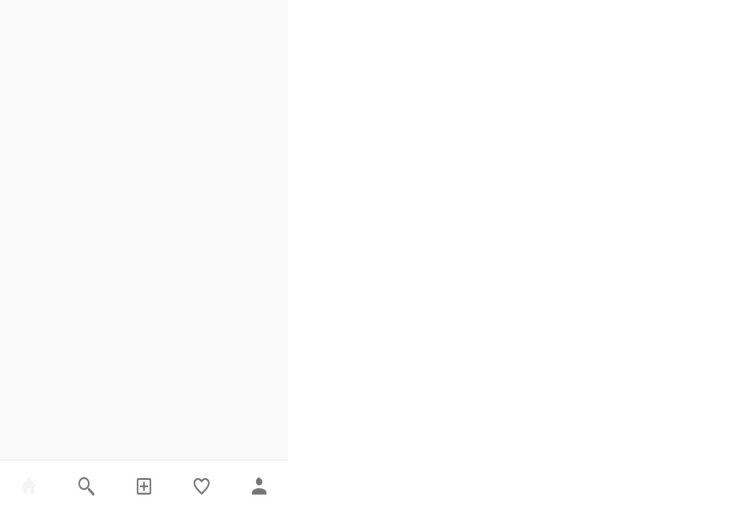
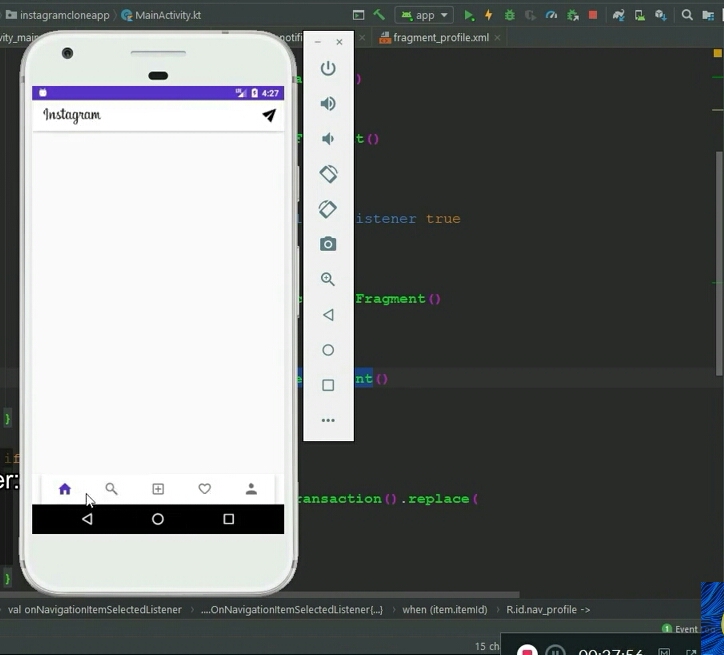
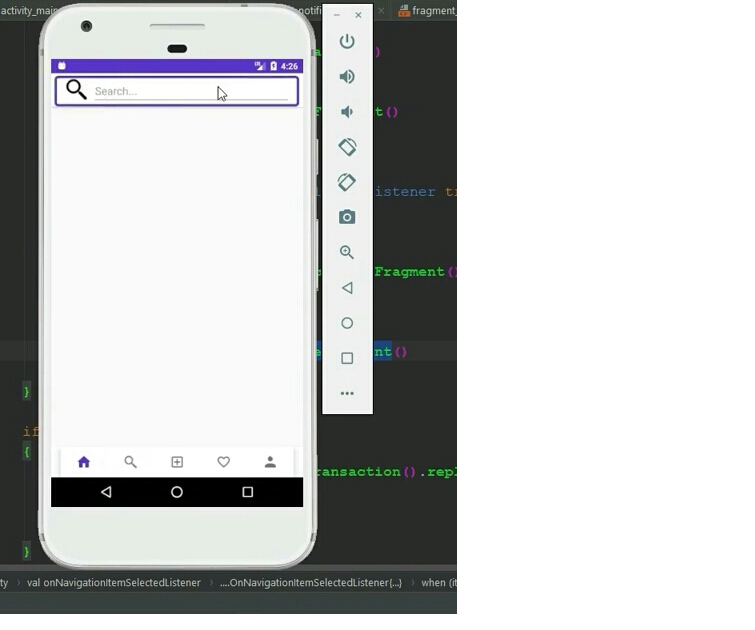
Expected Outcome
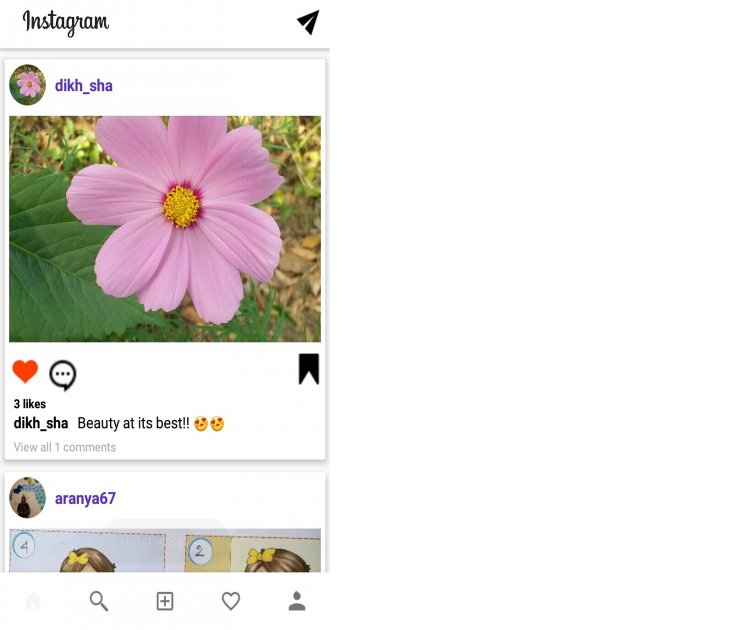
Your app should be able to navigate between the fragments. The output should be as shown below.
Creating the fragments
It’s time for us to work on the different sections mentioned in Bottom Navigation View. A desktop is advisable for quick access for web pages, whereas mobiles phones are known to create a great User Experience(UX). The expectations of people to spend less and get more things done without any issues are getting higher day by day. That makes the significance of UI/UX design for your mobile application even more pivotal.
Requirements
-
Go to the first folder in your
javafolder and do the following:-
Similar to the image shown below, make a folder named
Fragmentsand create the fragments as per our requirement in it.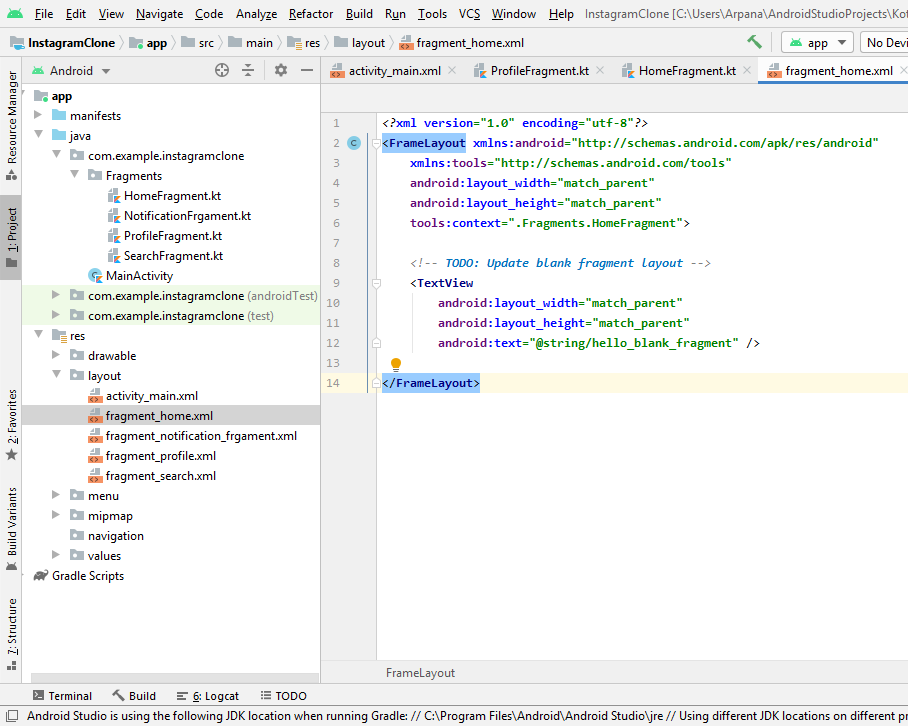
-
If you observe the
resfolder properly, you’ll notice that a separate layout file (i.e,.xmlfile) is created for each fragment. Just like we have done before in ouractivity_main.xml, we have to change the layout toRelative Layout. -
Now let's move to
fragment_home.xmland createappBarusing the following code:<com.google.android.material.appbar.AppBarLayout android:layout_width="match_parent" android:layout_height="wrap_content" android:id="@+id/app_bar_layout" > <androidx.appcompat.widget.Toolbar> <RelativeLayout android:layout_width="match_parent" android:layout_height="wrap_content"> <!-- write code for app bar layout here --> </RelativeLayout> </androidx.appcompat.widget.Toolbar> </com.google.android.material.appbar.AppBarLayout> -
Then add
RecyclerViewfor holding posts in Home page.<androidx.recyclerview.widget.RecyclerView android:id="@+id/recyclerview_home" android:layout_width="match_parent" android:layout_height="wrap_content" android:layout_below="@+id/app_bar_layout"> </androidx.recyclerview.widget.RecyclerView> -
Here is how it should look like after designing.

-
-
Next step is to move to
fragment_search.xmlandfragment_notification.xml, design them in the same manner like the home page.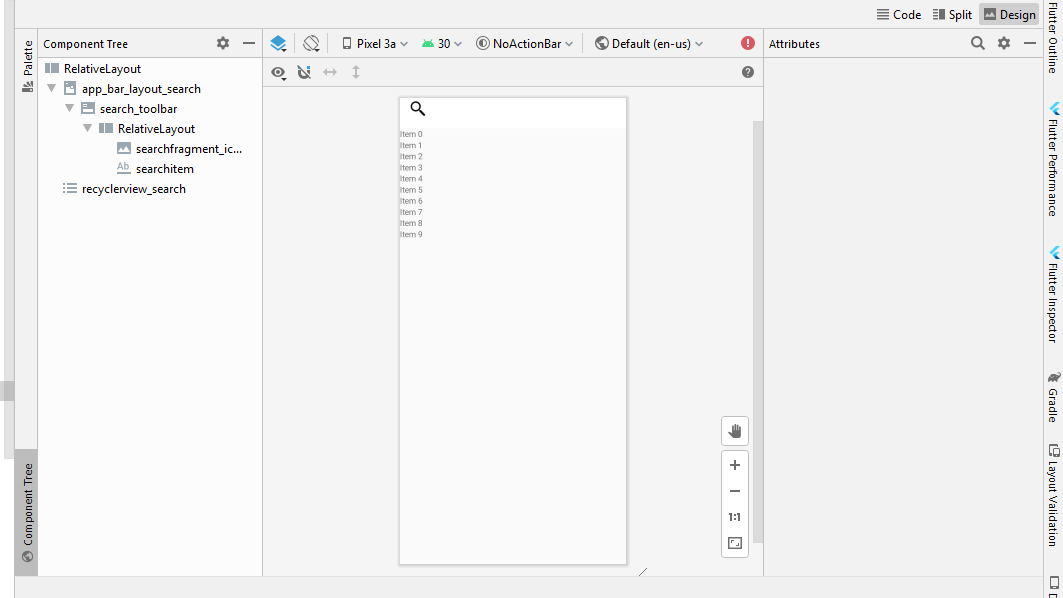

-
Then move to
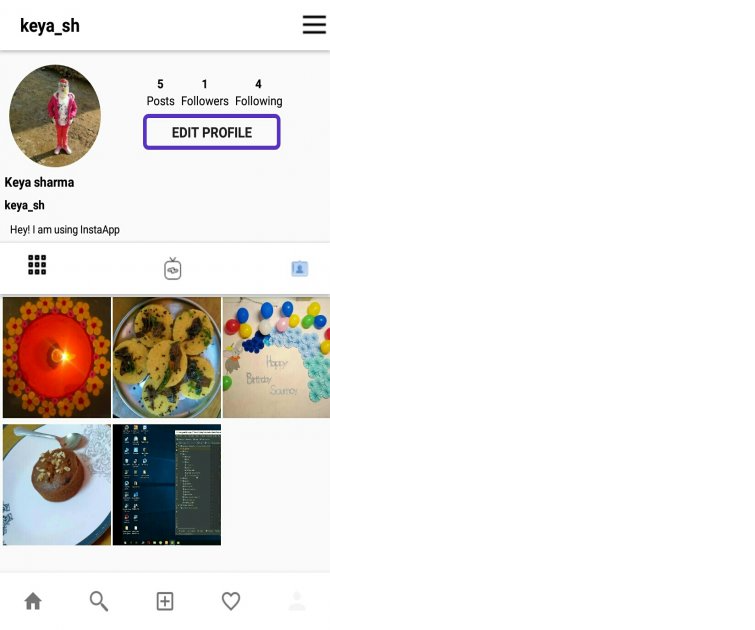
fragment_profile.xmlwhere we have to work little extra on designing the UI. Go to the Instagram phone app for getting an idea of how it should look.-
Firstly, add
CircleImageViewdependency to our project. Go to Circle ImageView GitHub repository and check out the steps. -
Make
AppBarwith aTextViewfor showing Username. -
Add
Scroll Viewand make layout for whole profile page inside this scroll view. Here is how the profile page will look.
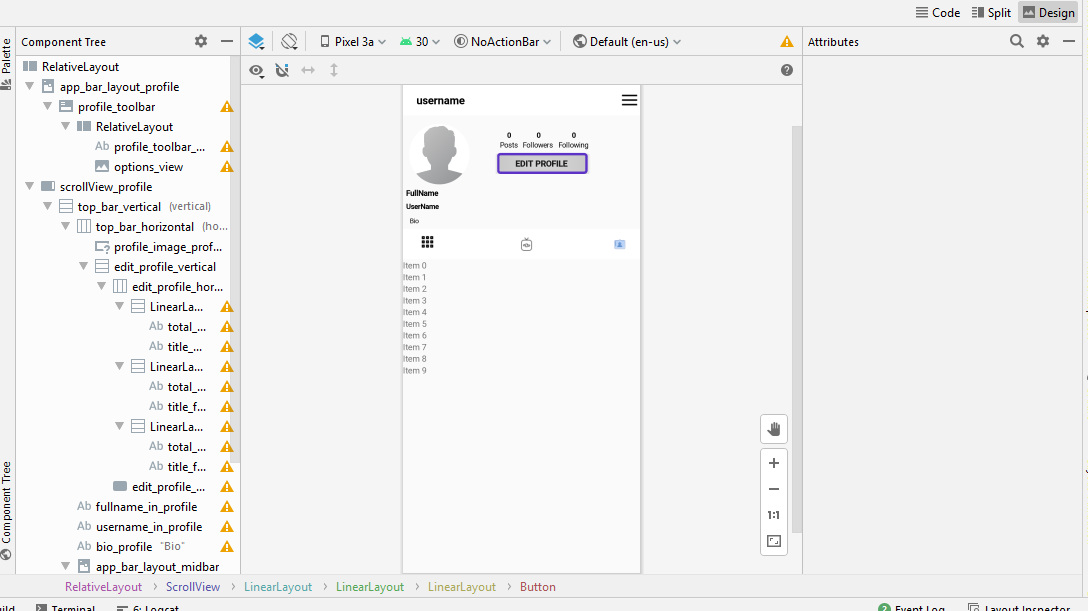
[Note: We are not expecting you to integrate functionalities to your icons yet, just design it for now.]
-
Bring it On!
-
Can you add actions to your appBar and make it an
Action Barfor example? The ActionBar, now known as the App Bar, is a consistent navigation element that is standard throughout modern Android applications. In the given image below, you can see an example ofAction Bar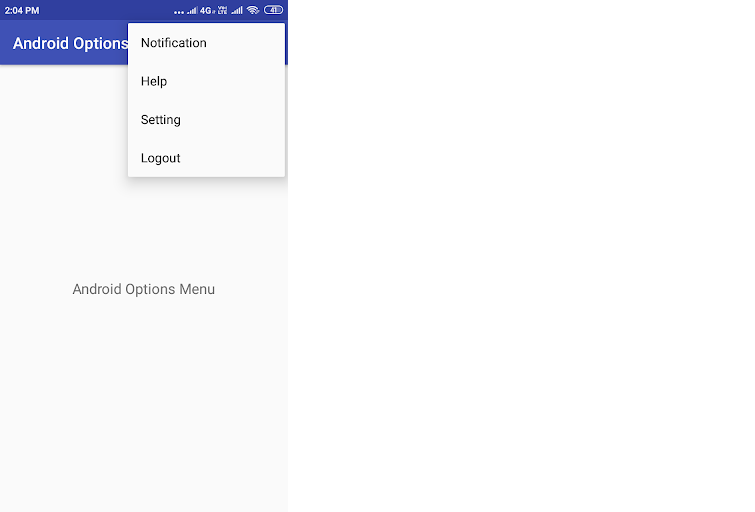
Expected Outcome
On completion of this milestone, you should have all your fragments ready for main Action.
The result should be similar to the screenshot shown below.
Setting up Firebase and Authentication
Firebase is a great service provided by Google for configuring the backend of any web or mobile application with all the general necessities like database preparation, authentication using various methods, etc. In this milestone, we’ll be preparing our database and setting up authentication using email and password.
[Note: Use the references provided to implement the following requirements.]
Requirements
-
Create a project on Firebase.
-
Register your application and set up Firebase hosting.
-
Go to Project-level
build.gradlefile and add this dependency.classpath 'com.google.gms:google-services:4.3.4's -
Add necessary Firebase dependencies and plugin in the (app-module)
build.gradlefile.
Dependencies
  implementation 'com.google.firebase:firebase-core:18.0.0'
  implementation 'com.google.firebase:firebase-auth:20.0.1'
  implementation 'com.google.firebase:firebase-database:19.6.0'
  implementation 'com.google.firebase:firebase-storage:19.2.1'
Plugin
apply plugin: 'com.google.gms.google-services'[Note: Always use the latest version of the dependencies]
-
Create
LoginActivityandSignUpActivity. Design the layout so that it looks similar to the ones shown below.
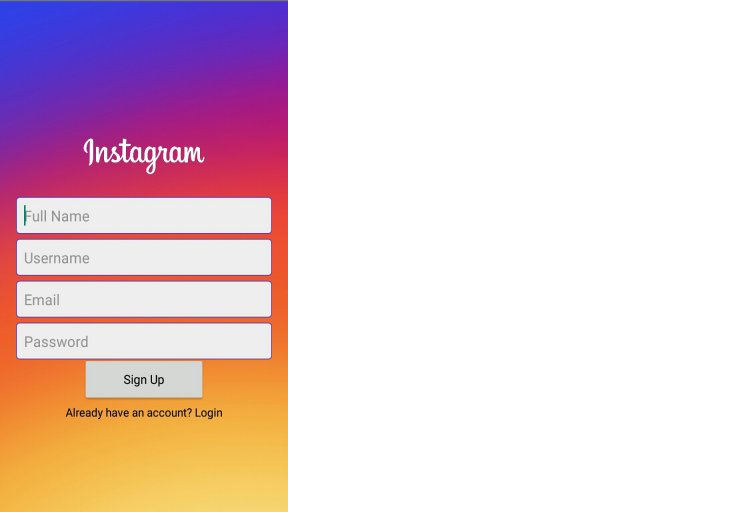
[Note: Feel free to check out Instagram app for reference.]
-
Setup the firebase database and setup sign-in method using Email/Password.
-
In
SignUpActivity, create a method calledcreateAccount()and utilize the following code to make use of Firebase authentication and database.private fun createAccount() { val mAuth: FirebaseAuth = FirebaseAuth.getInstance() mAuth.createUserWithEmailAndPassword(email,password) .addOnCompleteListener { task -> if(task.isSuccessful) { saveUserInfo(fullName,userName,email,progressDialog) } else { val message=task.exception!!.toString() Toast.makeText(this,"Error : $message", Toast.LENGTH_LONG).show() mAuth.signOut() progressDialog.dismiss() } } } -
Then utilize the following code for saving user data in firebase realtime database in
saveUserInfo():private fun saveUserInfo(fullName: String, userName: String, email: String,progressDialog:ProgressDialog) { val currentUserId=FirebaseAuth.getInstance().currentUser!!.uid val userRef : DatabaseReference=FirebaseDatabase.getInstance().reference.child("Users") //using hashmap to store values val userMap=HashMap<String,Any>() userMap["uid"]=currentUserId userMap["fullname"]=fullName userMap["username"]=userName.toLowerCase() userMap["email"]=email userMap["bio"]="Hey! I am using InstaApp" userMap["image"]="image url" //pasting data in database userRef.child(currentUserId).setValue(userMap) .addOnCompleteListener {task -> if(task.isSuccessful) { Toast.makeText(this,"Account has been created",Toast.LENGTH_SHORT).show() //to follow own account by default FirebaseDatabase.getInstance().reference .child("Follow").child(currentUserId) .child("Following").child(currentUserId) .setValue(true) //forwarding to home page val intent=Intent(this@SignUpActivity,MainActivity::class.java) intent.addFlags(Intent.FLAG_ACTIVITY_CLEAR_TASK or Intent.FLAG_ACTIVITY_NEW_TASK) startActivity(intent) finish() } else { val message=task.exception!!.toString() Toast.makeText(this,"Error : $message", Toast.LENGTH_LONG).show() FirebaseAuth.getInstance().signOut() progressDialog.dismiss() } } -
Now go to
LoginActivity, create a methodloginUser()and utilize the following code to authenticate user during login.private fun loginUser() { val mAuth: FirebaseAuth = FirebaseAuth.getInstance() mAuth.signInWithEmailAndPassword(email, password) .addOnCompleteListener { task -> if (task.isSuccessful) { progressDialog.dismiss() val intent = Intent(this@LoginActivity, MainActivity::class.java) intent.addFlags(Intent.FLAG_ACTIVITY_CLEAR_TASK or Intent.FLAG_ACTIVITY_NEW_TASK) startActivity(intent) finish() } else { val message = task.exception!!.toString() Toast.makeText(this, "Password or Email Invalid", Toast.LENGTH_LONG).show() mAuth.signOut() progressDialog.dismiss() } } } -
Now add the following code in
LoginActivityto redirect to home page if a user is logged in.override fun onStart() { super.onStart() if(FirebaseAuth.getInstance().currentUser!=null) { //forwarding to home page val intent=Intent(this@LoginActivity,MainActivity::class.java) intent.addFlags(Intent.FLAG_ACTIVITY_CLEAR_TASK or Intent.FLAG_ACTIVITY_NEW_TASK) startActivity(intent) finish() } }Finally call the above methods by setting
setOnClickListeneron Login and Signup buttons.
Bring it On!
- Configure other sign-in methods like FB sign-in, Google sign-in, etc.
Expected Outcome
You should be able to create a Firebase project and prepare database and authentication for your application. Also, you should have a fully functional signup and login activity.
The Edit Profile page
Now it’s time for us to customize our account using EditProfile functionality. So, let’s get straight into it.
Requirements
-
Create
EditProfileactivity and style it as shown in the picture below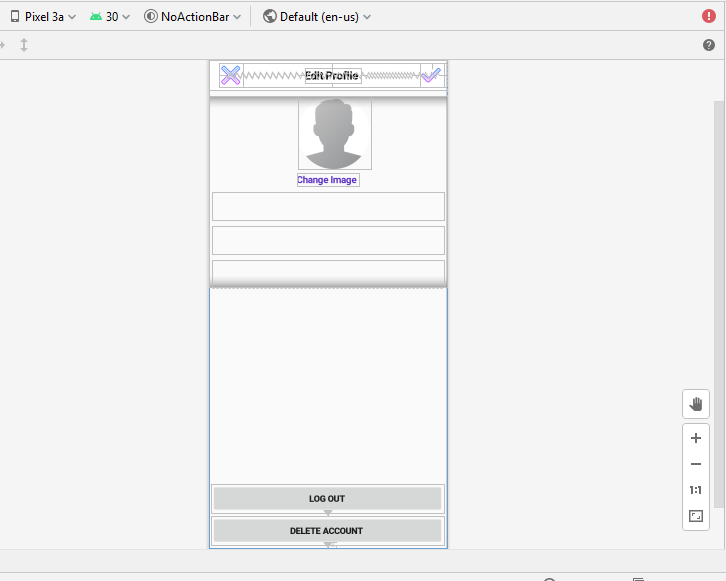
[Note: You are free to refer to the Instagram app too].
-
Now for making our
Edit Profilepage display user data as per the logged in user, add the following method in it:private fun getUserInfo() { val usersRef = FirebaseDatabase.getInstance().reference.child("Users").child(firebaseUser.uid) usersRef.addValueEventListener(object : ValueEventListener { override fun onCancelled(error: DatabaseError) { } override fun onDataChange(snapshot: DataSnapshot) { if (snapshot.exists()) { val user = snapshot.getValue<User>(User::class.java) Picasso.get().load(user!!.getImage()).placeholder(R.drawable.profile).into(accountSettings_image_profile) accountSettings_fullname_profile?.setText(user.getFullname()) accountSettings_username_profile?.setText(user.getUsername()) accountSettings_bio_profile?.setText(user.getBio()) } } }) } -
Then for updating our user information like username, fullname and bio, utilise the method given below:
private fun updateUserInfoOnly() { when { TextUtils.isEmpty(accountSettings_fullname_profile.text.toString()) -> { Toast.makeText(this, "Full Name is required", Toast.LENGTH_SHORT).show() } TextUtils.isEmpty(accountSettings_username_profile.text.toString()) -> { Toast.makeText(this, "username is required", Toast.LENGTH_SHORT).show() } else -> { val userRef: DatabaseReference = FirebaseDatabase.getInstance().reference.child("Users") //using hashmap to store values val userMap = HashMap<String, Any>() userMap["fullname"] = accountSettings_fullname_profile.text.toString() userMap["username"] = accountSettings_username_profile.text.toString().toLowerCase() userMap["bio"] = accountSettings_bio_profile.text.toString().toLowerCase() userRef.child(firebaseUser.uid).updateChildren(userMap) Toast.makeText(this, "Account is updated", Toast.LENGTH_SHORT).show() //forward to home page using intent } } } -
Now comes the most important task of updating profile image and for that we have to use
Picasso LibraryandAndroid crop Image library.-
Go to (app-module)
build.gradleand add the required dependencies.implementation 'com.squareup.picasso:picasso:2.71828' implementation 'com.theartofdev.edmodo:android-image-cropper:2.8.+' -
Add the following permissions in AndroidManifest.xml file.
<uses-permission android:name="android.permission.READ_EXTERNAL_STORAGE"/> <uses-permission android:name="android.permission.WRITE_EXTERNAL_STORAGE"/> -
Add crop activity inside application tag in manifest file
<activity android:name="com.theartofdev.edmodo.cropper.CropImageActivity" android:theme="@style/Base.Theme.AppCompat" />[Note: See the references for help nad better understanding]
-
Utilize the given code to crop image activity :
accountSettings_change_profile.setOnClickListener { checker="clicked" //if button clicked CropImage.activity() .setAspectRatio(1,1) .start(this@EditProfile) } -
To get cropped image:
    override fun onActivityResult(requestCode: Int, resultCode: Int, data: Intent?) {

    super.onActivityResult(requestCode, resultCode, data)
    if (requestCode == CropImage.CROP_IMAGE_ACTIVITY_REQUEST_CODE) {

        val result = CropImage.getActivityResult(data)

        if (resultCode == Activity.RESULT_OK) {
            imageUri= result.uri
            accountSettings_image_profile.setImageURI(imageUri)
        }
        else if (resultCode == CropImage.CROP_IMAGE_ACTIVITY_RESULT_ERROR_CODE) {
            val error = result.error
        }
    }
}
-
-
Utilize the given method to upload image:
private fun uploadProfileImageandInfo() { when { imageUri == null -> Toast.makeText(this, "Please select image", Toast.LENGTH_SHORT) .show() //add progress dialog here //uploading image val fileRef = storageProfileRef!!.child(firebaseUser.uid + ".jpg") val uploadTask: StorageTask<*> uploadTask = fileRef.putFile(imageUri!!) uploadTask.continueWithTask(Continuation<UploadTask.TaskSnapshot, Task<Uri>> { task -> if (!task.isSuccessful) { task.exception?.let { throw it Toast.makeText(this, "exception:--"+it, Toast.LENGTH_SHORT).show() progressDialog.dismiss() } } return@Continuation fileRef.downloadUrl }).addOnCompleteListener ( OnCompleteListener<Uri>{task -> if(task.isSuccessful) { val downloadUrl=task.result myUrl=downloadUrl.toString() val ref=FirebaseDatabase.getInstance().reference.child("Users") val userMap = HashMap<String, Any>() userMap["fullname"] = accountSettings_fullname_profile.text.toString() userMap["username"] = accountSettings_username_profile.text.toString().toLowerCase() userMap["bio"] = accountSettings_bio_profile.text.toString() userMap["image"] = myUrl ref.child(firebaseUser.uid).updateChildren(userMap) Toast.makeText(this, "Account is updated", Toast.LENGTH_SHORT).show() } }) } }[Note: You have to use setOnClickListener() for calling these methods]
-
Set
OnClickListeneron Login button and logout using the following code:logoutbtn.setOnClickListener { FirebaseAuth.getInstance().signOut() }
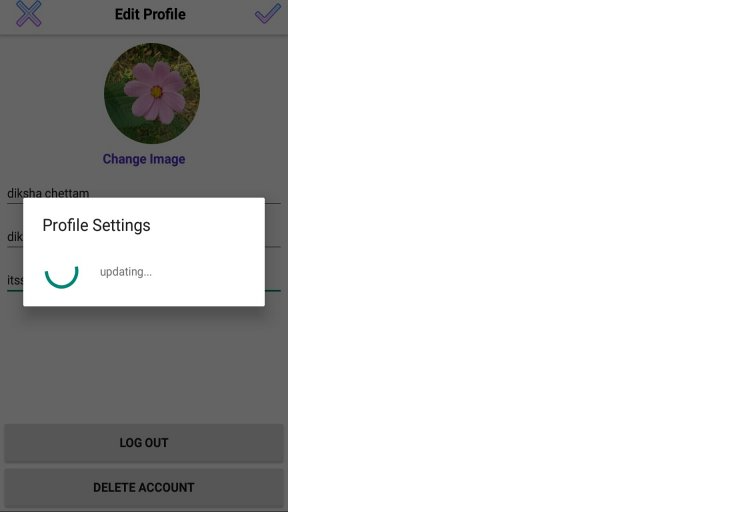
Expected Outcome
You should have a fully functional Edit Profile Page and Log out functionality at your disposal. Let's check out how it will look after putting so much of hard work !!

Search User functionality
Now We will add one of the most important functionalities of Social Media apps, i.e Search. Let's start with it.
Requirements
-
First thing is to create a layout file called
User_item_layout.xmlfor holding user data in a container. Style it as shown below: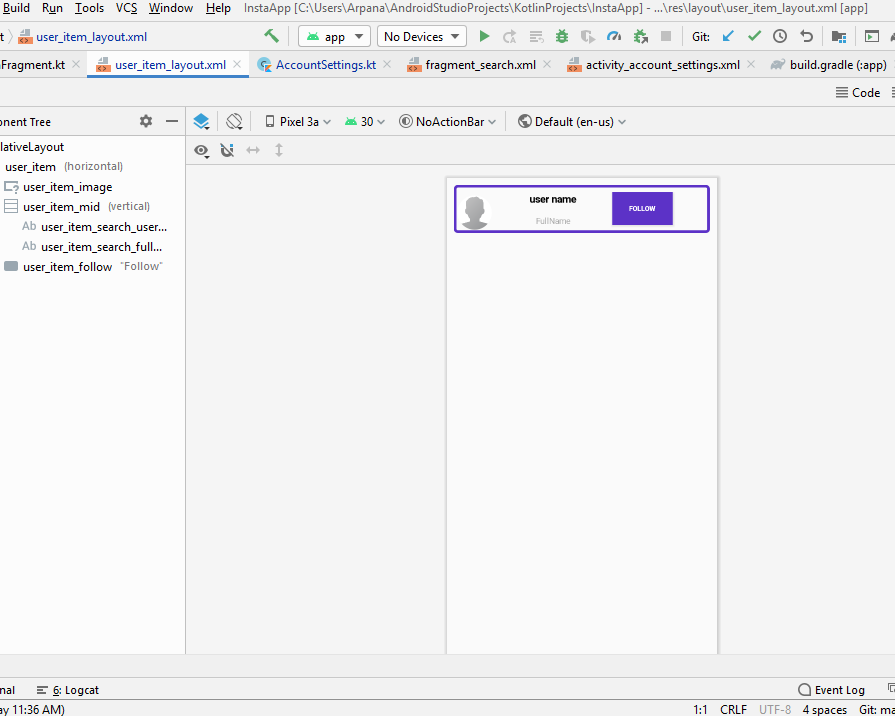
-
Create a folder named
Model(just likeFragmentsin task 3) and make a classUser(POJO class). Add getters and setters for user item data. -
Create a folder named
Adapter(just likeFragmentsin task 3) and make a classUserAdapterto hold and display data using recycler view. -
Go to
SearchFragmentand createsearchUser()for querying data from database. Use the following code:private fun searchUser(input:String) { val query=FirebaseDatabase.getInstance().reference .child("Users") .orderByChild("username") .startAt(input) .endAt(input + "\uf8ff") query.addValueEventListener(object:ValueEventListener { override fun onCancelled(error: DatabaseError) { } override fun onDataChange(datasnapshot: DataSnapshot) { mUser?.clear() for(snapshot in datasnapshot.children) { //searching all users val user=snapshot.getValue(User::class.java) if(user!=null) { mUser?.add(user) } } userAdapter?.notifyDataSetChanged() } }) } -
Create
retrieveUser()to retrieve users and dispaly them in Search Fragment.private fun retrieveUser() { val usersSearchRef=FirebaseDatabase.getInstance().reference.child("Users")//table name:Users usersSearchRef.addValueEventListener(object:ValueEventListener { override fun onCancelled(error: DatabaseError) { Toast.makeText(context,"Could not read from Database",Toast.LENGTH_LONG).show() } override fun onDataChange(dataSnapshot: DataSnapshot) { mUser?.clear() for (snapShot in dataSnapshot.children) { val user = snapShot.getValue(User::class.java) val fullName = snapShot.child("fullname").value.toString() val userName = snapShot.child("username").value.toString() val bio = snapShot.child("bio").value.toString() val image = snapShot.child("image").value.toString() val uid = snapShot.child("uid").value.toString() User(userName, fullName, bio, image, uid) if (user != null) { mUser?.add(User(userName, fullName, bio, image, uid)) } userAdapter?.notifyDataSetChanged() } } }) } -
Now add
addTextChangedListeneron search bar and call the above methods.
Expected Outcome
You should be able to search users by using their user names as shown in image in below.

Follow and Unfollow functionality
It’s time to add Follow and Unfollow feature.
Requirements
-
In
UserAdapter, use the following code to follow a user and update theirFollowingandFollowerslist in database:firebaseUser?.uid.let { it1 -> FirebaseDatabase.getInstance().reference .child("Follow").child(it1.toString()) .child("Following").child(user.getUid()) .setValue(true).addOnCompleteListener { task -> if (task.isSuccessful) { firebaseUser?.uid.let { it1 -> FirebaseDatabase.getInstance().reference .child("Follow").child(user.getUid()) .child("Followers").child(it1.toString()) .setValue(true) } } } } -
Use the given code to unfollow user :
firebaseUser?.uid.let { it1 ->
    FirebaseDatabase.getInstance().reference
      .child("Follow").child(it1.toString())
      .child("Following").child(user.getUid())
      .removeValue().addOnCompleteListener { task -> //reversing following action
        if (task.isSuccessful) {
                firebaseUser?.uid.let { it1 ->
                FirebaseDatabase.getInstance().reference
                    .child("Follow").child(user.getUid())
                    .child("Followers").child(it1.toString())
                    .removeValue()

              }
          }
      }
  }
Bring it On!
- Create a method
checkFollowingStatus()to check a user's following status and display it accordingly in button text.
Expected Outcome
You should be able to easily follow and unfollow any user.
Adding Post functionality
It’s high time to add the most amazing and coolest feature of social media apps (i.e, Post Image).
Requirements
-
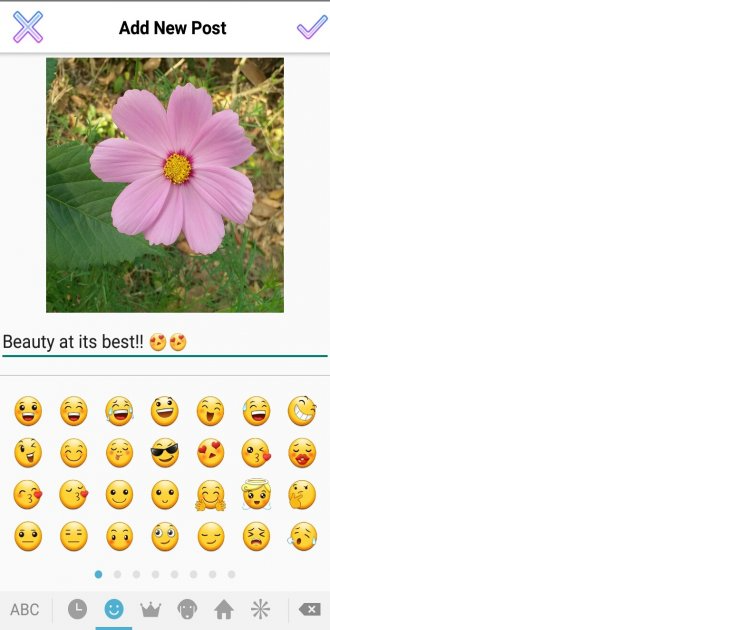
Create a new activity named
AddPostand Style it withImageViewandTextViewfor holding image and caption. -
Add
cropImageActivityand overrideonActivityResultto get an image from gallery. -
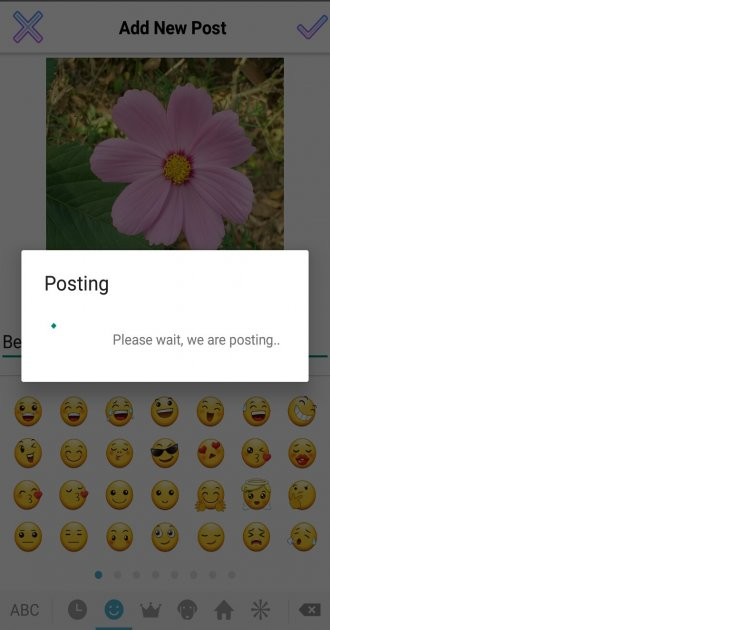
Create a method for
uploadingPost()and utilize the below code to storepostin database.val fileRef = storagePostPictureRef!!.child(System.currentTimeMillis().toString()+ ".jpg") var uploadTask: StorageTask<*> uploadTask = fileRef.putFile(imageUri!!) uploadTask.continueWithTask(Continuation <UploadTask.TaskSnapshot, Task<Uri>>{ task -> if (!task.isSuccessful) { task.exception?.let { throw it } } return@Continuation fileRef.downloadUrl }).addOnCompleteListener (OnCompleteListener<Uri> { task -> if (task.isSuccessful) { val downloadUrl = task.result myUrl = downloadUrl.toString() //adding post to database val ref = FirebaseDatabase.getInstance().reference.child("Posts") val postid=ref.push().key val postMap = HashMap<String, Any>() postMap["postid"] = postid!! postMap["caption"] = write_post.text.toString() postMap["publisher"] = FirebaseAuth.getInstance().currentUser!!.uid postMap["postimage"] = myUrl ref.child(postid).updateChildren(postMap) //forward to home page } })[Note: Take reference from uploadImage() in EditProfile task]
-
Next part of this task is to dispaly
Postsin home page. For this, we have to do something similar likeSearch Usertask. Create a layout file calledpost_item_layout.xmland style it. -
Make model and adapter class for
Post. -
Then go to
PostAdapter, create agetPublisherInfo()to fetch the information (profile image, username, etc) about the user who published the post. The method will similar togetUserInfo()in task 5. -
Now move to
HomeFragment, retrieve posts usingretrievePosts()of users whoseuseridin one's following List. Display posts on home page using Adapter. Utilize the code given below:var recyclerView:RecyclerView?=null recyclerView=view.findViewById(R.id.recyclerview_home) val linearLayoutManager:LinearLayoutManager=LinearLayoutManager(context) linearLayoutManager.reverseLayout=true linearLayoutManager.stackFromEnd=true recyclerView.layoutManager=linearLayoutManager postList=ArrayList() postAdapter=context?.let { PostAdapter(it,postList as ArrayList<Post>) } recyclerView.adapter=postAdapter
Bring it On!
- Get an adapter and layout file for
MyPoststo display any user's posts on his profile page
Expected Outcome
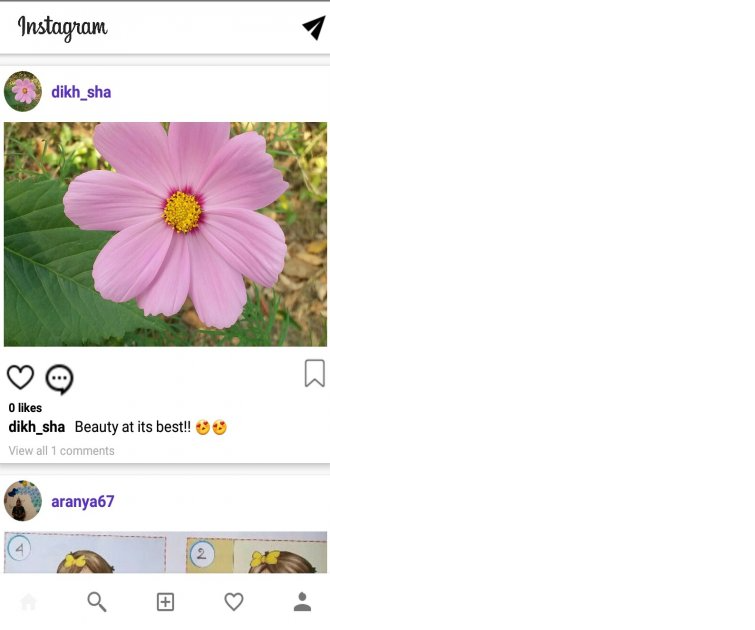
You can easily post any image with a caption and see the posts on your home page.

Adding Like, Comment and Save Features
Now it's time to make our app, a social media app in real terms by including like, comment and save features, which enable social interaction of users.
Requirements
-
Set
onClickListeneron like button and utilise the below code to like a picture:if (holder.likeButton.tag.toString()=="like") { FirebaseDatabase.getInstance().reference.child("Likes").child(post.getPostId()) .child(firebaseUser!!.uid) .setValue(true) } else { FirebaseDatabase.getInstance().reference.child("Likes").child(post.getPostId()) .child(firebaseUser!!.uid) .removeValue() } -
Create two methods
isLiked()andnoOfLikes()to show the likeButton image accordingly and display the no. of Likes on Post. Refer to code below for help:firebaseUser=FirebaseAuth.getInstance().currentUser val postRef=FirebaseDatabase.getInstance().reference.child("Likes").child(postid) postRef.addValueEventListener(object : ValueEventListener { override fun onDataChange(datasnapshot: DataSnapshot) { if (datasnapshot.child(firebaseUser!!.uid).exists()) { imageView.setImageResource(R.drawable.heart_clicked) imageView.tag = "liked" } else { imageView.setImageResource(R.drawable.heart_not_clicked) imageView.tag = "like" } } })//to get the count of Likes likesNo.text = datasnapshot.childrenCount.toString()+" likes" -
Do the same thing for saving Posts
-
Now for comment feature, create
AddCommentActivity,Commentmodel andCommentAdapter. -
Then go to
AddCommentActivity, create apostComment()to store comments in database (in the same manner like we stored User's data). -
Add
retrieveComment()to access all the comments of a post and display it usingCommentAdapter. -
Now go to
PostAdapter, add a method for showing the no. of comments on a particular post.
Bring it On!
- Get a method for displaying the number of followers, following and posts on user's profile page.
Expected Outcome
Boom!! you have finally created something called Social Media App.

Notification functionality
By now our application looks good and is a proper social media app, but it is missing one very important aspect and that is the Notification facility. Moreover, this application is a clone inspired from Instagram. We can add more functionalities and customize the application to make it our own.
[Note: This milestone is not mandatory. Those who want to go that extra step are welcome to try their best!]
Requirements
- Make
notification_item_layoutand style it. - Use Model and Adapter for Notification (same as Post Item).
- Then go to Notification Fragment and create required methods.
- Give a new name to your application and make a new logo for it. Use that logo in place of the Instagram logo.
- Change the styles of all the visual components.
Bring it On!
- Build the APK and share it with more and more people and use it. This might be a great start as a potential developer.
Expected Outcome
You should be able to get notification if somebody likes , saves or comments on your post.
Deployment!
It’s time to deploy our app and show it to the world!
Requirements
-
Build
apkof your app. -
Follow the references
Bring it On!
- Get your own Developer account and publish your deployed application.
Expected Outcome
You should be able to deploy your application to Firebase so that it’s accessible to everyone on the internet.