You will be building your own markdown editor, which you can actively use for designing well crafted markdown documents.
Objective
Project Context
Markdown is widely used in blogging, instant messaging, online forums, collaborative software, documentation pages, and readme files. And also While uploading your repository to Github, you also need to write a README.md file (.md is the extension of a markdown file).
This project is quick to implement as it's beginner friendly, using features of React it will blow your mind and influence you to build on more cool ideas to an extent to make feature-rich editor on web.
You will build this project by using Javascript and some extended React style to write beautiful clean code. You will be using some other dependencies like react-remarkable. To save the progress you will also use localStorage to persist the changes you made, automatically.
Project Stages
This project consists of the following stages:

High-Level Approach
-
Configure you development environment.
-
Build some useful components which will help you to develop the app easily into smaller chunks in developer friendly ways.
-
Now define the context of your app and use the provided contextAPI values by react library.
-
Build your own hooks to hook into the context state of your app.
-
Design in your style and eventually you will build the simple markdown editor module which can be used used as a dependency on another project.
Primary goals
-
Learn about markdown parsing, markdown syntax, markdown plugins and realtime state saving.
-
Learn to configure
Context APIand hook into the contextual state by usingcustom hooks.
Objective
You will be building your own markdown editor, which you can actively use for designing well crafted markdown documents.
Project Context
Markdown is widely used in blogging, instant messaging, online forums, collaborative software, documentation pages, and readme files. And also While uploading your repository to Github, you also need to write a README.md file (.md is the extension of a markdown file).
This project is quick to implement as it's beginner friendly, using features of React it will blow your mind and influence you to build on more cool ideas to an extent to make feature-rich editor on web.
You will build this project by using Javascript and some extended React style to write beautiful clean code. You will be using some other dependencies like react-remarkable. To save the progress you will also use localStorage to persist the changes you made, automatically.
Project Stages
This project consists of the following stages:
High-Level Approach
-
Configure you development environment.
-
Build some useful components which will help you to develop the app easily into smaller chunks in developer friendly ways.
-
Now define the context of your app and use the provided contextAPI values by react library.
-
Build your own hooks to hook into the context state of your app.
-
Design in your style and eventually you will build the simple markdown editor module which can be used used as a dependency on another project.
Primary goals
-
Learn about markdown parsing, markdown syntax, markdown plugins and realtime state saving.
-
Learn to configure
Context APIand hook into the contextual state by usingcustom hooks.
Getting Your Environment Ready
Before the process of development starts, we need to setup the proper development environment which is the requisite of the application we're aiming to build.
Requirements
- Create a React app.
- Install the dependencies such as
remarkableorreact-markdownwhich will help us not to rewind the wheel. - Delete unnecessary files like -
testing,logo,setup, etc., since, probably, you will not be needing them. - Create reference folders like -
components,context,hooksin./srcfolder.
References
Expected Outcome
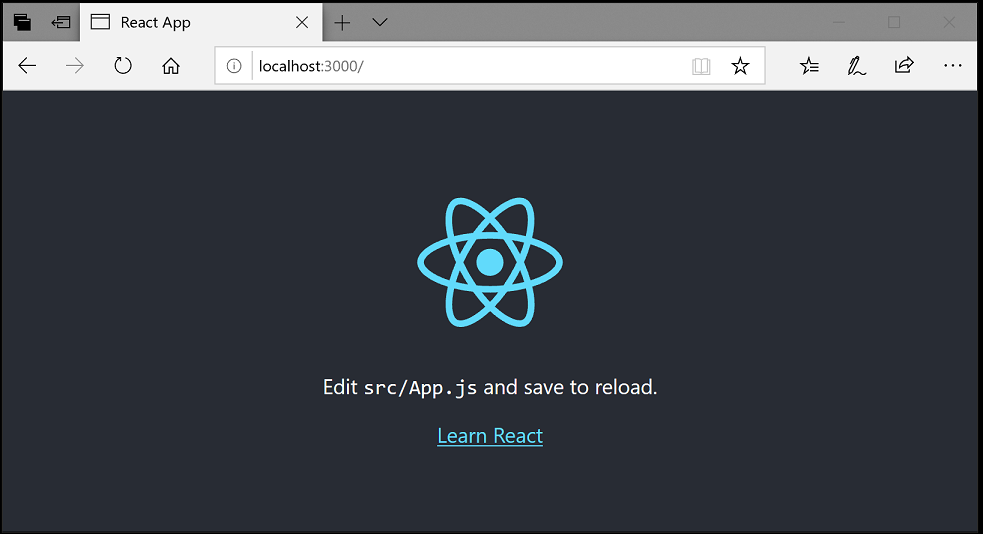
On completion of this task, you will find the folder structure looks like this picture.

- On completion of this task, you should be able to setup a React application. The application should give a similar result as shown in the screenshot below when visited at http://localhost:3000.
Segregating The App into Components
Before the development stage, it is a good practice to break the app into multiple components. And you would find the way very easier to manage various states in smaller chunks.
As you will prefer to write functional components, its better to have it! And in the long run this will help us to call various operations by calling separate functions.
Requirements
-
Create a
componentsdirectory in./srcfolder. -
Create two components like -
RawInputArea.jsxMarkdownSanitized.jsx
[NOTE: JSX stands for JavaScript XML. JSX allows us to write HTML in React. JSX makes it easier to write and add HTML in React.]
-
And build a UI where user can write things and side-by-side it will render on another side. It is recommended to use
FlexLayoutconcepts.
Manage Global State Building Context API
Context provides a way to pass data through the component tree without having to pass props down manually at every level. — React Definition on Context API.
You can think of it as a situation where you want to share a set of data that are global to the tree of React components. Then it will be an ideal place to use the React new Context API functions.
Requirements
-
As you already created the
contextdirectory in./srcfolder. Create a file to handle thecontextual stateof your app by usingReact.createContext(initialState), where asinitialStateis the default initial value, in this app you can use any good greeting message to show user on initial load. -
Now, as you build the context state, it's time to provide the state to the component tree. Wrap up
App.js, for example - if your context name ismarkDownContextthen<markDownContext.Provider value={{...}}><markDownContext.Provider value={{ rawText, getMarkDownAsHTMLOutput, handleChangeRawInputedText }} > <div className="App"> // ... deeper inside component tree ... </div> </markDownContext.Provider>[NOTE: rawText, getMarkDownAsHTML etc. are as the values coming from custom hooks, do not scare you will cover it in the next milestone.]
Bring It On!
-
To see the context state in action, you can use the context with the other nested components.
-
For example, you can use in
MarkdownSanitized.jsxcomponent, inject and use the context provided value (passed as value object inApp.jsfile).
Expected Outcome
You can see in the developer console by console.log(React.useContext(...)) and do check the outcome.
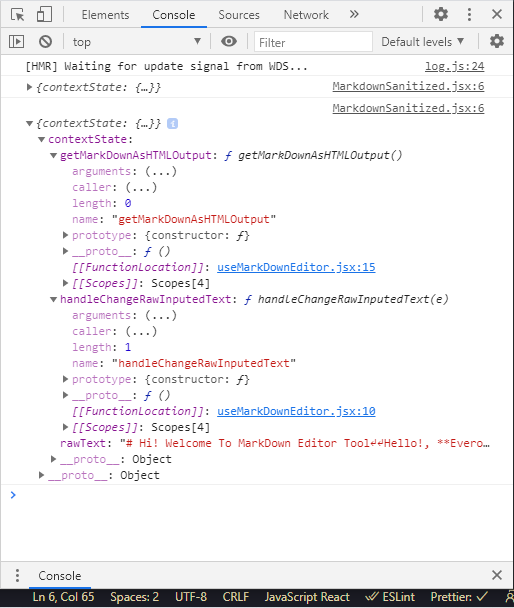
[NOTE: In the above console.log you can see 3 things - two custom build functions and origin data state coming from context. The upcoming milestone will throw more light on the same.]
[BYOH] - Build Your Own Custom Hooks
React's new "hooks" APIs give functional components the ability to use local component state, execute side effects, and more. Hooks are backward-compatible, which means it does not contain any breaking changes. Also, it does not replace your knowledge of React concepts.
From a collection of react hook, you just only need 3 basic hooks - useState, useEffect and useContext.
Requirements
-
Now, in the
./src/hooks/directory create a file with conventional namespacing for react hooks. If you do not know -useSomething()where use... is basically a naming convention to create custom hooks. -
Remember installing dependency
remarkable? Time to use that. Initialize a new object of the class. -
Create a variable to manage using
React.useState()and also create utility functions to manage and handle change of raw inputed text by user and to sanitize the raw input text and convert and render that as HTML functionality having functions. -
Use
React.useEffect()to allow the sideEffects of the hooks. -
Lastly return the necessary things as functional object from the respective functions to be used by the nested component trees.
  const md = new Remarkable();
function useMarkdownEditor() {
    // useState manage React.useState()
    // function handleChangeRawInputedText(){};
    // function getMarkDownAsHTMLOutput(){};

return { rawText, handleChangeRawInputedText, getMarkDownAsHTMLOutput };
}
References
-
Refer Official Docs for Remarkable to add an enhanced experience of writing markdowns.
Bring It On!
-
Try to pass optional parameters like -
htmlParsefor allowing writing html tags directly in markdown editor,linkifyfor inserting img and video links if you want. -
Try to save the current written things on web using
localStorageit will be very easy to implement as you will need to store the globalcontextual stateon each key stroke events -
Do some exercise on localStorage to make it more feature rich.
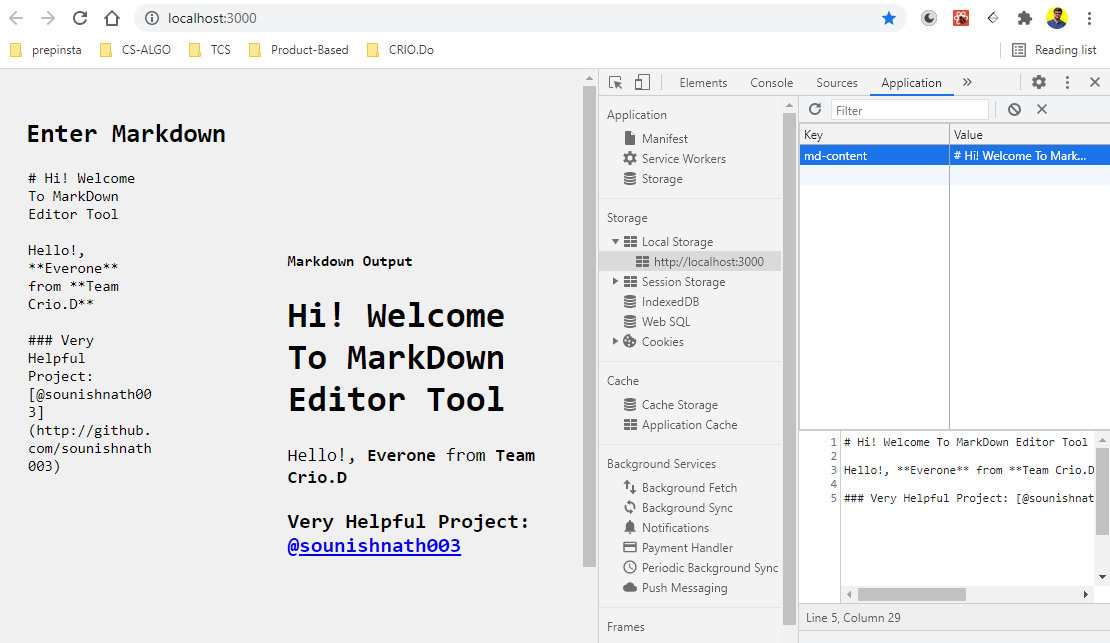
[NOTE: Simply go to the developer console/applications/localstorage and see the actions being stored realtime on handstoke, and being auto-saved when a user's not typing.]
Expected Outcome
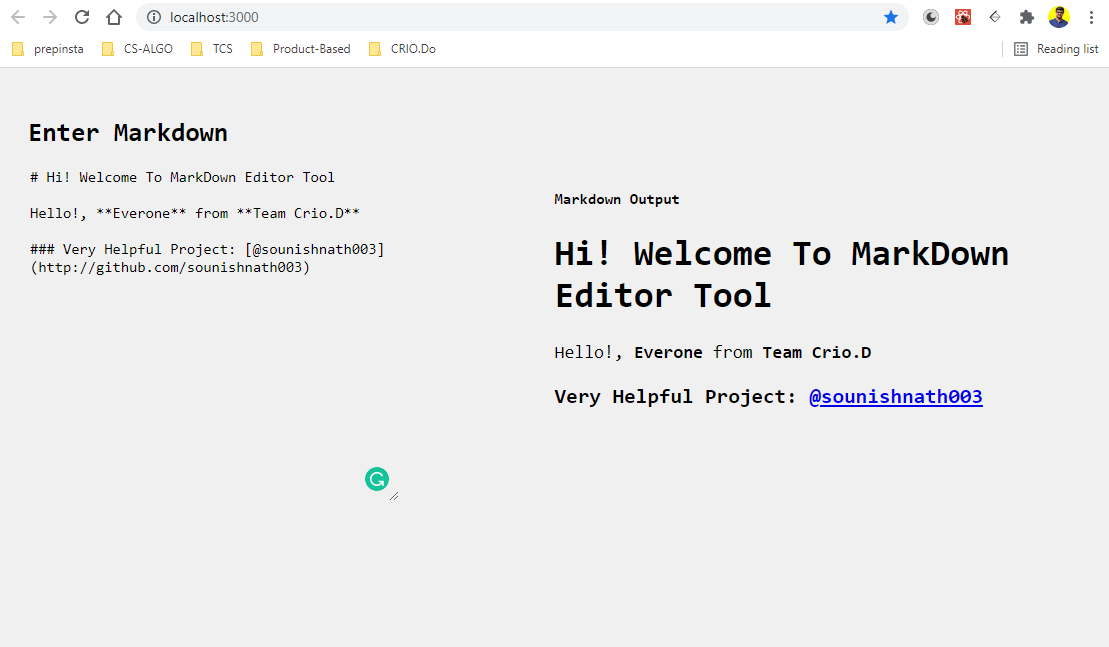
If you completed the all tasks genuinely you may find your app similar looking to this.
http://localhost:3000.
[Note: Kindly ignore the Grammarly icon.]